April 29th, 2012
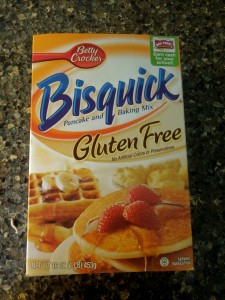
Bisquick has now been on the market for so many years. Part of the Betty Crocker family. It seems that I am always at the grocery store. Not very good at planning ahead. Never know what I want for dinner. So, there I was going up and down the isles, at Publix in Florida, when the new Gluten Free Bisquick caught my attention.
When had it come out? I had not seen it at my other favorite store, in Rehoboth, Giant. Immediately grabbed a couple of boxes. Could not wait to try it.
Admit it, even if you make everything from scratch most of the time, Bisquick, has been a saviour through the years.
Once again, the Gluten Free Bisquick promises great strawberry shortcakes, pancakes, dumplings, groud beef pies, fried chicken….endless recipes. I can keep going on and on.
The original Bisquick is still there doing its thing. If you don’t have celiac disease or gluten intolerances, then keep on using it. But, if you do have these health issues, the Gluten Free Bisquick is a good alternative for those other recipes.
The original Bisquick’s main ingredient is wheat flour. The Gluten Free Bisquick’s main ingredient is rice flour. Their website is http://www.bettycrocker.com/products/bisquick/glutenfree.
I decided to make breakfast muffins. Don’t have a recipe since I just started adding a little bit of this and a little bit of that.
My A Little Bit of This, A Little Bit of That Breakfast Muffins
A half a cup of Jimmy Dean’s sausage (it is gluten free)
A quarter cup of chopped onions
A quarter teaspoon of sage
pepper to taste
a few dashes of Tabasco (optional)
In a frying pan sautee all of the above and put it aside to cool off.
In a bowl mix the following. Remember that I don’t have exact measurements. Just wing it.
2 cups of Gluten Free Bisquick
2 eggs
About 1/2 cup of milk
Whisk all of the above and if you need to add more milk, do so.
Then, add the cooled sausage mixture and blend it in.
Add to that mixture about 1/2 cup of extra sharp cheddar cheese, or your favorite one.
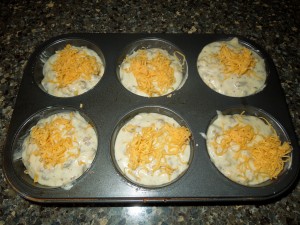
Grease and fill a large muffin cup baking pan pretty much all the way to the top. You want your muffins to have a presence. If you so desire, you can even sprinkle some more cheese on top.
Bake for about 20 minutes or so. Insert a knife to make sure they are done; if they need more time, you know what you need to do, put them back in for a few more minutes.
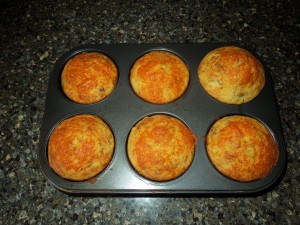
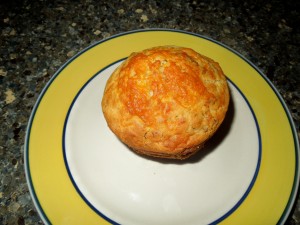
Review: My family loved them; a meal in itself with great combinations of flavors. I am still playing with the mixture. Adding jalapenos, olives?
Note: Giant in Rehoboth Beach, Delaware, does not have it, but I have requested it. Will have to check the other grocery stores in the area. Will let you know.
Update: I told you I would let you know when Giant would have it on their shelves. They do now. So, go get it. It is pretty good.
Have a good one!!
March 12th, 2012
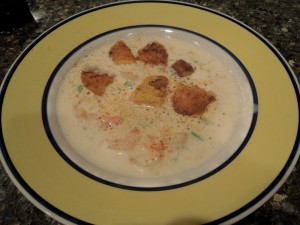
I love shrimp. They are so versatile, and adapt so easily to so many recipes. The majority of people love shrimp; even the ones that do no like fish.
This recipe is so easy and pretty fast. I, actually, messed it up a bit and it still came out, getting rave reviews from my family. That was a good thing since that’s what they were having for dinner last night.
Fastest Shrimp Bisque Ever
2 cups chicken broth (low sodium) If you are making the recipe gluten free, read the ingredients on the broth.
2 teaspoons Old Bay Seasoning, usually found at grocery stores
12 ounces fresh or frozen medium size shrimp in shells, thawed. I would add a couple more ounces of shrimp; you might have to buy the 24 ounce bag.
3 celery stalks, sliced thin
1 12 ounce can of evaporated milk
1 cup of milk
2 tablespoons all purpose flour ( I used a rice flour due to the gluten allergy in my household.)
3 anchovies, finely chopped (Don’t wrinkle your nose. They add a lot of flavor.)
Old Bay or seafood seasoning (optional)
In a 4 quart pot combine the chicken broth, the Old Bay, shrimp and Celery. Cook, uncovered, over medium-high heat for 5 minutes or until shrimp shells turn pink and shrimp are opaque. Turn stove off.
Remove shrimp with a slotted spoon or tongs; set aside to cool. Leave the celery in the pot.
In a medium bowl whisk together the evaporated milk, milk, flour, and anchovies. Turn stove back on. Add milk mixture to to the liquid in the pot. Cook uncovered over medium heat for about 10 minutes, stirring here or there. You want it to acquire a nice consistency; not too thick but creamy enough. If you want it thicker, just dissolve more flour in a little bit of chicken broth and add to the pot.
Meanwhile, peel the shrimp. Chop about half of them. Add all of them to the pot. Cook for another 2 minutes or until heated through.
Ladle into bowls; sprinkle with a little Old Bay. Offer your guests or family a salad and make it a meal.
Note: I bought a tube of Polenta, then sliced it and cooked it on a skillet in order to make croutons to top my bisque. It is optional, but they all liked it.
Another Note: I had run out of rice flour, so I used Pamela’s Gluten Free Baking & Pancake Mix. It did the job.
Enjoy!! Guess what? This recipe can easily be doubled.
March 1st, 2012
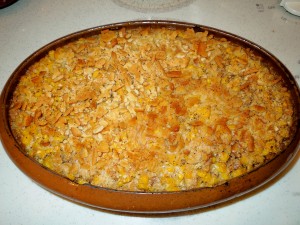
I love easy casseroles, they are so versatile and good, as well. For example, take this scalloped corn casserole. It is, basically, assembled in no time. You can use it for breakfast, brunch, lunch, or dinner.
Guest for breakfast? Then, add eggs to it and fresh fruit. Brunch or lunch? Chicken, tuna or any salad you may want. Dinner? As an addition for barbecued meats or even for a meatless dinner, adding a vegetable and a green salad.
Your choice. And, it is one of those recipes that can easily be doubled.
The only thing I changed in this recipe was the cracker crumbs. I needed to use gluten free crackers, which I did.
Scalloped Corn
4 cups fresh, frozen or canned corn
3 eggs, beaten
1 cup milk
1 cup crushed saltines (30 crackers), divided
3 tablespoons butter, melted
1 tablespoon sugar
2 tablespoons finely chopped onion
Salt and pepper to taste
Pre-heat oven to 325 degrees.
In a large bowl, combine the corn, eggs, milk, 3/4 cup cracker crumbs, butter, sugar, onion, salt and pper.
Transfer to a greased 1 1/2 quart baking dish. Sprinkle with remaining cracker crumbs.
Baked, uncovered for 1 hour or until knife inserted near the center comes out clean.
Depending how hungry your crowd is, this recipe probably will serve 6.
How easy can that be!! Enjoy and make it your own.
Note: Thanks Paula for the corn. You saved me a trip to the grocery store!!
January 11th, 2012
I had cut out this paella recipe, knowing that it was going to have to be adapted to our way of eating. It was healthy and a bit different, using barley instead of rice. Barley was out of the question, my husband having a gluten allergy. And rice? Well, I was a little bored with it.
Something new to try was Quinoa. It is a grain as ancient as the Incas. They thought this grain was sacred. It is known as “the mother of all grains”. It has the best amino acid profile of all grain. It is gluten free, healthy for your heart, a whole grain, low in sodium and rich in fiber. It is as versatile as rice. It resembles couscous; smaller than barley.
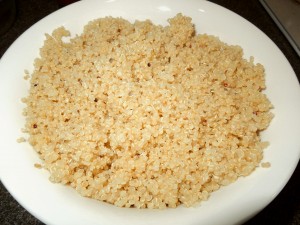
A Paella is a Spanish dish, cooked in a paellera. Well, I did not have one. A large pan would have to do. Some are Paella Valenciana, Paella de Mariscos and the Paella Mixta. Boy, mine was going to be, definitely, different. There are hundreds of ways to cook one and everyone has their favorite.
This was the first time I had used this recipe and I found it to be very good. The paella ended up being more wet than a traditional paella. Hope you like it.
Shrimp Paella with a Twist
1 1/2 cups Quinoa
3 or 4 tablespoons virgin olive oil
1 medium onion, chopped
1 cup red pepper, sliced in thin strips
1 cup yellow pepper, sliced in thin strips
1 small fennel bulb, stalks removed and cut into strips (1 1/2 cups)
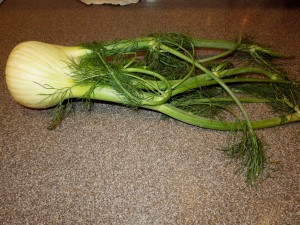 Fennel 3 cloves garlic, crushed
2 bay leaves
1/2 tsp. smoked paprika
1/2 tsp. ground turmeric
1/4 tsp. cayenne pepper
1/4 cup white wine vinegar
1 pinch of saffron (This is the world’s most expensive spice. Only a pinch is needed to add aroma, flavor, and color. You can find it at most grocery stores.)
2 1/12 cups of hot vegetable stock (I bought reduced sodium)
1/2 tsp. salt
3/4 lb. shelled large shrimp (about 17 shrimp) I decided to used the medium size shrimp and added about 20 shrimp or so to the pan.
1 cup peas, fresh, canned or frozen
1 cup grape tomatoes, halved
1 can artichokes, drained and quatered, marinate them in 2 tablespoons of Italian dressing. I used Wishbone, gluten free. Or, you can buy already marinated artichokes, drain and quarter them.
20 pitted Kalamata olives, halved.
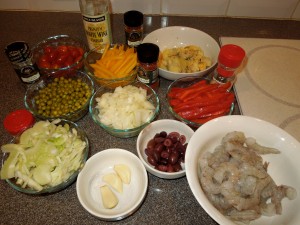
Cook the Quinoa per directions. Does not take long. Fluff and keep aside. Keep enough Quinoa to sprinkle over the dish when serving.
Heat oil in a large pan or skillet over medium heat and cook onion until softened; 5 minutes or so.
Add peppers and fennel. Cook until vegetables soften. Another 5 minutes. Add garlic and cook 1 minute.
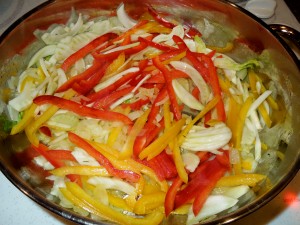
Add bay leaves, paprika, turmeric, and cayenne. Mix in Quinoa and cook for 2 minutes. Add vinegar, saffron, 2 cups of the stock and salt. Bring to a nice simmer.
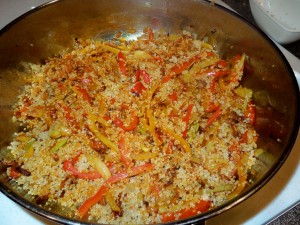
Stir and cook until liquid reduces by half. It won’t reduce completely. This might take about 15 minutes. Remove the bay leaves and discard.
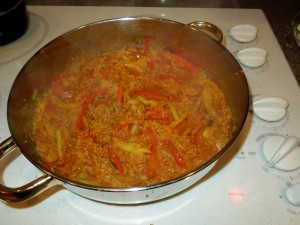
Stir in shrimp, peas, tomatoes, artichokes, olives and remaining 1/4 cup of stock. Simmer for about 2 or 3 minutes, then turn off the heat. Cover tightly and let it rest for about 10 minutes until shrimp are just cooked through.
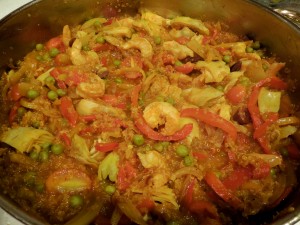
Serve, sprinkle with extra Quinoa and enjoy. It has a nice kick to it, don’t you think?
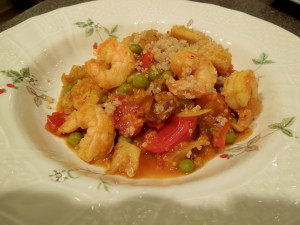
Note: This recipe is gluten free as I prepared it. If you want to use rice, then, be my guest. But, if you decide to use the barley, the recipe will not be gluten free.
Have a good one!! Talk to you later…
November 28th, 2011
Appetizers give us an excuse to enjoy special seafood treats; if you like seafood, and don’t have an allergy, that is. These pickled shrimp are so easy. And, shrimp are most often associated with appetizers. They are easily available, which is a good thing; different sizes, as well.
For appetizers is best to use the medium size shrimp. Buy the easy to peel, as well. The large or jumbo shrimp are difficult to pick up with your fingers or wooden picks. Probably, not practical as appetizers.
The following recipe can be doubled easily. You can play with it and make it your own. On top of a chopped salad? You bet. Try it out and play with it.
Pickled Shrimp
1 lb. medium shrimp, raw
1 tablespoon pickling spices
1 tablespoon Dijon mustard (I used Emeril’s/gluten free)
1 teaspoon prepared horseradish
1/4 cup vegetable oil
1 teaspoon salt
1/4 teaspoon celery salt
1/2 cup white wine vinegar
3 green onions, sliced
Pull shrimp from shells and discard shells.
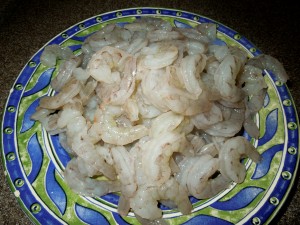
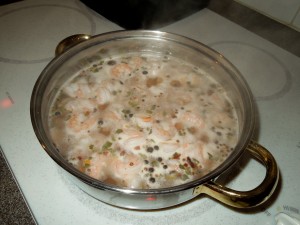
In a 2-quart saucepan, cover shrimp and pickling spices with water. Bring to a boil; simmer over medium heat for about 2 minutes. Strain water, leaving spices on shrimp; set aside.
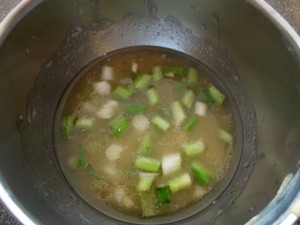
In a small bowl, combine mustard, horseradish, oil, salt, celery salt, vinegar and onions. Pour over drained shrimp. Cover and refrigerate. The ideal would be 6 hours or overnight. But as long as they are nice and cold, they will be delicious. It is just that the longer you leave the shrimp in the marinade the better they will absorb that taste.
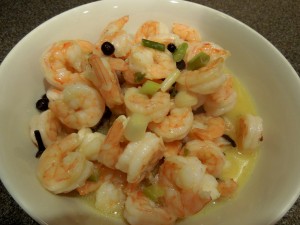
Enjoy!! This recipe is gluten free!! Just give your guests some wooden or plastic picks or small forks to pick up shrimp.
Talk to you later….
October 23rd, 2011
What are you talking about? No apples or prunes? No olives or raisins? Hahaha…You really can use all those if you really wanted to make it your own.
This pork roast was interesting to make. It was easy, if you find the ingredients…if not, that’s when you can also give it your own take on it. Just like I did.
Last year I bought a cookbook in Boulder, Colorado called Isabel’s Cantina by Isabel Cruz. She uses in her cooking bold ingredients like mangoes, limes, chiles, mint, ginger, cilantro, and guava. You better believe it that her cooking will never be bland.
Isabel has about 5 restaurants along the West Coast. When I saw that she had 2 of her restaurants in San Diego, I purchased the book so that I could tell my mother in law, who lives in San Diego to check them out. One of her restaurants is called Isabel’s Cantina in La Jolla and the other is Seaside Cantina in San Diego.
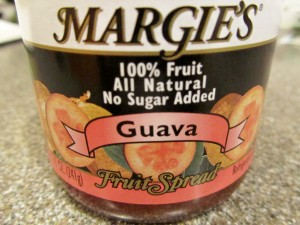
Two key ingredients in this pork roast are the pineapple and guava. Easy to find the pineapple, not so trying to find the guava paste to make the sauce in Rehoboth Beach. I have seen it, but of course, that day it was nowhere to be found at Giant.
I found guava fruit spread; that will do for now.
When I bought the pork loin I forgot that there were 2 in the package. It really would have been best to get one bigger roast.
The recipe uses pineapple chunks. When I make this recipe again, I will either cut those chunks in smaller pieces or even attempt crushed pienapple. Don’t know yet.
Anyway, here it goes.
Pork Roast Stuffed with Pineapple and a Drizzle of Guava Sauce
1/2 cup olive oil (depending on the size of the roast, I used 1/4 cup)
3 garlic cloves, minced
one 4 lb. boneless pork loin roast (I already told you what happened)
1 tablespoon dried oregano (again depending on the size of the roast, I used 1/2 of that.
Kosher Salt
Freshly Ground Black Pepper
one 20-ounce can pineapple chunks, drained (depending on the size of the roast; did not even use half of that)
raisins, dried cranberries (my own take)
Guava Sauce; I will tell you in a bit what I did when I get to that part of the recipe.
Pre-heat oven to 350 degrees
Mix together the olive oil and garlic
If you want trim the excess fat from the pork loin.
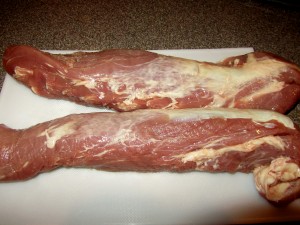
Then, split the loin in half lengthwise; but don’t cut all the way through to the other side. Open the loin and spread half of the olive oil mixture on top, and sprinkle with half of the oregano. Season with salt and pepper, optional.
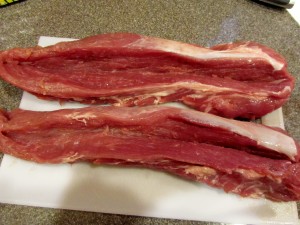
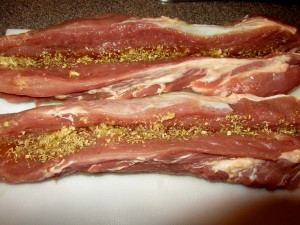
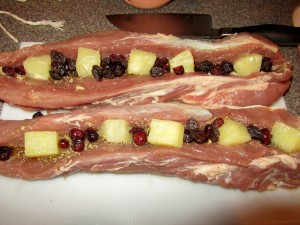
Put the pineapple chunks on the bottom of the roast. This is when I added my own take on this roast. Get some raisins and dried cranberries and fill betweeen the pineapple chunks. This is when I mentioned above that I could change this a bit to make it then easier to tie. The dried cranberries and raisins complement the pineapple so well; plus added a festive color to the dish.
Tie the roast with kitchen twine at 1-inch intervals; tricky but doable. Spread the remaining oil mixture and the remaining oregano. If you want to add more salt and pepper, then you know what to do.
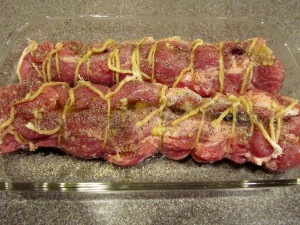
Tying the roast: The thinner end of the roast I folded up and tied it so that it would not get overcooked.
Put the roast in a roasting pan. I put it on a glass pan and transferred to the oven. Roast the pork in the oven for 30 minutes.
Guava Sauce
I remember growing up in Puerto Rico when guavas were found in everyone’s yard. That, I hear, is a thing of the past. It is very hard to find. The paste can be found in Latin markets, though.
1/3 cup cubed guava paste (I used almost the whole jar of the guava fruit spread)
1 garlic clove, minced (optional)
2 tablespoons olive oil
2 tablespoons dry white wine
A sprinkle of Kosher salt
A sprinkle of red pepper flakes to give it an extra kick (optional)
If you are using the paste then you need to melt it by combining the guava paste with 2/3 cup of water in a small saucepan over medium heat. When it has dissolved, add the olive oil, white wine and salt. Simmer for a couple of minutes, whisking to combine the ingredients. Let it cool.
You know, I did not do any of that. I just whisked the above ingredient into the guava preserve and even added a tablespoon of orange juice. No cooking was necessary.
After the pork has been cooking for 30 minutes, take it out and drizzle it with the guava sauce. I used all of it.
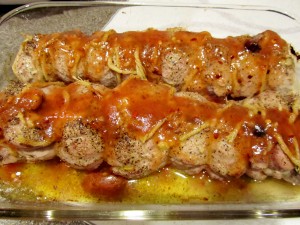
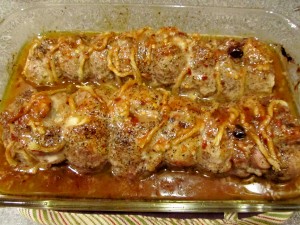
Put it back in the oven until it reaches an internal temperature of 140 degrees in the center.
Take it out; let it rest, cut the pork into 1/4 inch slices, serve with the guava sauce drippings and add your own side dishes.
My family wanted wild rice and asparagus with my homemade mayo.
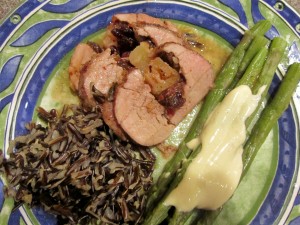
This dish is certainly worth making again. I hope you try it and make it your own…..talk to you later…
Note: The recipe, as I made it, was gluten free. You need to check all ingredients and guava, to make sure it is. If it does not say it on the package you can access the company’s website.
August 22nd, 2011
I had to laugh. I got an e-mail from the Delray Beach Green Market. This market is the one I visit when in Delray Beach, Florida. Just like the markets in Delaware, it is that time of the morning when you can stroll and get fresh baked goods, produce, and flowers, while sipping your coffee. Great way to start the day, by the way.
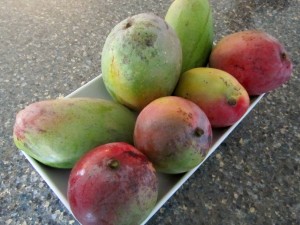
I laughed because it said that in August, in South Florida, the mangoes are falling off the trees. Ha ha. Here, in Delaware, I found that Giant was having a sale; 4 for $5.00. I bought them. Why not? I love mangoes, probably as much as I love ice cream.

Growing up in Puerto Rico I remember sitting with a bag of mangoes and just diving into them; peeling them with my teeth; eating that sweet flesh. I am not kidding, no knife was needed. Some of the mangoes had fibers and some of them were just perfectly round.
If you do want to know how to eat a mango without getting messy, then go to You Tube and on the search put How to Eat a Mango. There is an informative video for you to check out. Still, in my book, you need to get messy!!
In a perfect world I would love to pick them directly from the tree. But, since beggars can’t be choosey, then a grocery store is probably the best bet on my neck of the woods.
Mangoes are native of India and are the most cultivated fruit of the tropical world. Full of vitamins, as well.
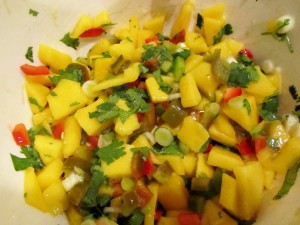
The Fresh Mango Salsa is one of those that you can add a little bit of this or a little bit of that. You want a little more of a kick? Then, add more jalapeno. Don’t like the cilantro? Well, then you know what to do, but it does add so much.
The Mango Salsa is very versatile; on fish, pork, hamburgers, salads, omelettes, corn chips, or you can do like I did and top corn fritters with it.
Mango Salsa
1 mango, peeled, chopped
1/4 cup finely chopped red bell pepper
2 green onions, chopped
2 tablespoons chopped cilantro
1 fresh jalapeno, chopped (I used canned jalapeno wheels; chopped)
2 tablespoons lime juice
1 tablespoon lemon juice
Mix all ingredients in a medium bowl. Cover and allow the salsa to rest at least 30 minutes before serving. It is really good. I love the combinations of the jalapeno, mango and cilantro along with the citrus flavors of the lime and lemon juices.
Corn Fritters
When I first came to Baltimore in 1976 someone introduced me to a place in Maryland that used to serve Whiskey Sours with a basket of corn fritters. I always remember that and as I made them, my thoughts went back to those times long ago.
There are so many recipes for corn fritters. I have to use gluten free flour so I decided to use Pamela’s Baking & Pancake Mix. This mix is for waffles, cookies, crepes, muffins, and more. When I saw that it said “and more”, I made the corn fritters using:
1 cup of Pamela’s Mix
1 large egg
1/4 cup milk
1 tablespoon sugar
1 can corn, drained
You want the mixture to be nice and thick in order to drop them by the spoonfuls in hot oil.
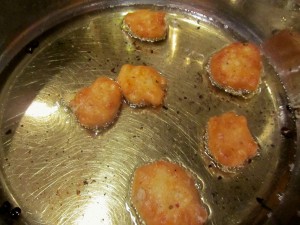
Fry them until they achieve a nice golden brown color. Careful not to burn. Place on paper towels to drain. Then, just serve them like I did; with the Mango Salsa. Could be an appetizer, a tapa, or a side dish.
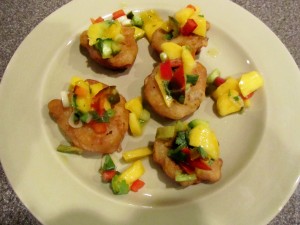
Corn fritters go well with ham or poultry. But, they are delicious with maple syrup, butter or jelly.
Traditional Corn Fritter Recipe
1 1/2 cups flour
2 1/2 teaspoons baking powder
1 teaspoon salt
1 (20 ounce) can cream-style corn
1/2 cup canned corn, drained
1 egg, slightly beaten
Sift dry ingredients.
Combine corn and egg. Stir corn and egg mixture into sifted dry ingredients until just blended.
Drop batter by tablespoons into hot oil. Fry for a few minutes, turning once during frying. Drain on paper towels.
Note: Since we have an abundance of corn in the summer, using fresh corn is the way to go. In a hurry? Use canned corn.
Enjoy and make it your own!!…Talk to you later…
May 15th, 2011
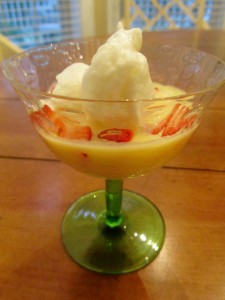
I don’t which one I like better; a flan, a creme brulee, a baked custard or a floating island. Last night my perfect ending, after finally cooking my softshells they way I like them, was a floating island.
I had to make a boiled custard first. I don’t know why it is called “boiled” when you really do not let it boil. Basically, it is eggs, sugar and either flour or cornstarch.
Floating island is considered to be a French dessert. I love it when the weather gets warm because you can fix it ahead of time and with so many berries available; it looks so pretty.
Floating Island
3 eggs
1/4 cup sugar
2 tablespoons flour or 1 tablespoon cornstarch
2 cups whole milk
1 tsp. vanilla
Separate the eggs, saving the egg whites. Beat egg yolks with a hand mixer. Add sugar and either flour or cornstarch.
Then, add milk, and stir. Place in a medium saucepan.
Cook over medium to low heat and stir until slightly thickened. Do not let it boil.
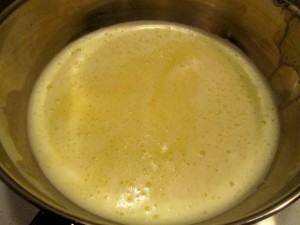
Remove from heat and let it cool before placing it in the refrigerator.
At this point you can serve it just like that, topped with berries. Or, you can make a floating island.
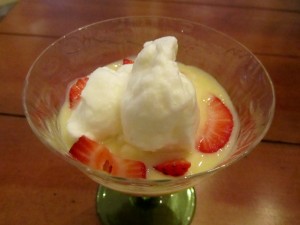
Floating Island
Just before serving the custard, whip the 3 egg whites. Keep whipping and add 3 tablespoons of sugar, gradually. Then, add 1/2 tsp of vanilla. You can also a little bit of finely grated lime into it for more color and taste.
Whip until stiff and place spoonfuls on the custard.
Note: I made it gluten free using cornstarch or you can use gluten free flour. Make sure the vanilla is gluten free, as well.
Enjoy!!….talk to you later….
 
|


Comments Off on Gluten Free Bisquick is Now Available on the Market, Sausage/Cheese Muffins Recipe, Easy